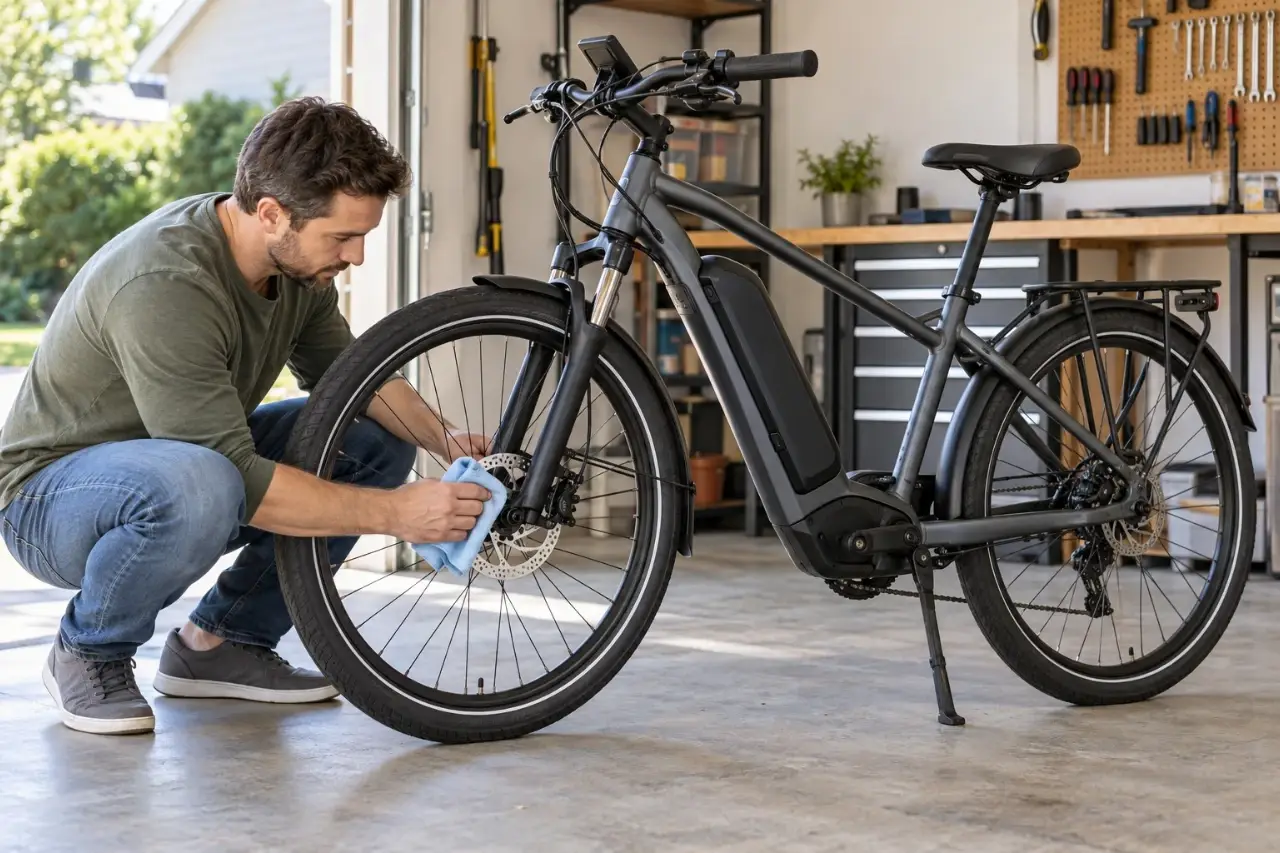
To clean e-bike disc brake rotors, turn off the bike, let the brakes cool, and wipe both sides of each rotor’s braking surface with a clean, lint-free cloth and a cleaning method approved by the brake manufacturer. Isopropyl alcohol is recommended by several brake makers, but cleaning instructions vary. Keep oil and overspray away from the brake pads, let everything dry, and check braking before riding. If stopping power is weak or inconsistent, do not ride until the problem is resolved.
Rotor cleaning is a useful maintenance task after road grime or a chain-lube accident. It will not, however, fix every squeal or restore pads that have absorbed oil. This guide covers the cleaning you can usually do without removing a wheel or opening the brake system—and the signs that call for a mechanic instead.
Why E-Bike Disc Brake Rotors Need Cleaning
A disc brake rotor is the metal disc attached to a wheel hub. When you pull a brake lever, pads inside the caliper press against the rotor to slow the wheel. Oil, grease, some cleaning products, and road residue can interfere with the friction between these parts.
Common sources of contamination include chain lubricant sprayed near the rear wheel, greasy fingerprints, runoff from drivetrain degreaser, and residue from bike-care sprays. Contamination may cause squealing or reduced braking, but noise alone does not prove the rotor is dirty.
Wet brakes can make temporary noise until moisture clears. Persistent scraping, pulsing, or squealing can also come from a bent rotor, worn pads, poor caliper alignment, or an incomplete bedding-in process. If the main problem is unexplained noise, see why e-bike brakes squeal and how to troubleshoot them.
What to Use—and What to Avoid
For ordinary rotor cleaning, gather a fresh lint-free microfiber or shop cloth, clean hands or suitable protective gloves, and enough light to see both sides of each rotor. A stable bicycle stand can help but is not required if you can safely access the braking surfaces with the bike supported.

Choose the cleaning method by brake brand and model, not by a cleaner’s advertising. For example:
- SRAM: Its rotor-care guidance recommends isopropyl alcohol and warns that some brake cleaners contain additives that may affect braking.
- TEKTRO: Its FAQ recommends isopropyl alcohol for disc brake cleaning.
- Shimano: Some Shimano brake manuals specify soapy water or a dry cloth for brake-system maintenance and warn against commercially available brake cleaners or silencing agents because they may damage seals.
These examples are not interchangeable instructions for every brake. Check your e-bike owner’s manual and the manual for the actual brake system. If you cannot identify the brakes or confirm a suitable cleaning product, ask a qualified bicycle mechanic.
Avoid automotive brake cleaner unless the brake manufacturer explicitly approves it for your components. Do not use chain lube, WD-40-type penetrating oil, silicone spray, wax, household polish, or general drivetrain degreaser on the rotor. Never use a cloth that has been used on the chain or cassette. If you use isopropyl alcohol, follow its label, work in a ventilated area, and keep it away from flames, sparks, and hot components.
How to Clean E-Bike Disc Brake Rotors: 6 Steps
1. Switch Off the Bike and Let the Rotors Cool
Park on level ground, switch off the e-bike, and make sure it cannot roll or tip while you work. Follow the owner’s manual on any battery-removal precautions. You generally do not need to remove the battery or wheels simply to wipe accessible rotor surfaces.
Disc rotors can become very hot after hills or repeated braking. Wait until they are completely cool before touching them. Their edges and ventilation cutouts can also injure fingers, especially when a wheel is moving.
2. Check for Damage Before Cleaning
Look at the rotor and nearby caliper in good light. Check for visible oil, heavy buildup, deep scoring, cracking, obvious warping, or signs of a brake-fluid leak. Confirm that the wheel is properly secured, following your bike’s instructions.
Stop here and arrange a brake inspection if the rotor is cracked or badly distorted, hardware appears loose, fluid is leaking, or the brake lever feels spongy or pulls unusually close to the handlebar. Cleaning will not correct those faults. Rotor thickness limits also vary, so have a mechanic check wear if you are uncertain.
3. Prevent New Oil Contamination
Move chain lubricants and drivetrain cleaners away from the work area. Wash your hands or change to clean gloves after touching greasy parts. Use a new cloth reserved for brake cleaning.
If you have just cleaned or lubricated the chain, check that no spray or runoff reached the rotor or caliper. To avoid this problem next time, follow our e-bike drivetrain cleaning guide and keep separate cloths for the drivetrain and brakes.
4. Wipe Both Sides of the Braking Track
Use the cleaning method allowed by your brake manufacturer. Where isopropyl alcohol is approved, lightly dampen the cloth rather than spraying liquid across the wheel or into the caliper. Where the manufacturer specifies mild soapy water or a dry cloth, follow that instruction instead.
Wipe the flat braking track on one side of the rotor, then the other. Work in small sections, moving the wheel slowly by hand only when your fingers and cloth are clear of the caliper and openings in the disc. Do not spin the wheel quickly while holding a rag against it. Keep the cloth off the pads and avoid touching the cleaned braking track with bare fingers.
You normally do not need to remove the rotor, loosen the caliper, or open any hydraulic components for this surface cleaning.
5. Let the Rotor Dry and Reinspect It
Let the rotor dry completely according to the product or brake manufacturer’s directions. If you used an approved soapy-water method, remove any remaining soap as directed and dry thoroughly. Check for streaks, oily residue, or lint. Use a fresh section of cloth if another pass is needed.
Do not spray cleaner into the caliper hoping to wash oil out of the pads. Do not heat the rotor or pads with a flame or heat gun, and do not try to silence them with sprays. A cleaner-looking rotor is not proof that contaminated pads are safe.
6. Check Braking Before Returning to Normal Riding
With the bike stationary and secure, squeeze each brake lever separately. Each brake should engage firmly with a familiar lever feel. If you can rotate a wheel safely, check that its brake stops it and releases normally. Make sure nothing was moved or loosened during cleaning.
Only if the stationary checks are normal, perform a cautious walking-speed braking check in a clear, level area away from traffic. Test both brakes progressively. If stopping feels weak, grabby, delayed, or inconsistent—or the lever travel has changed—stop using the e-bike and seek professional service. Do not begin with a downhill run, busy commute, or cargo load.
What If the Brakes Still Squeal After Cleaning?
The problem may be in the pads rather than on the rotor surface. Brake pads can absorb oil or hydraulic fluid, and wiping the rotor will not reliably restore them. For some manufacturers, contaminated pads must be replaced; certain types of contamination may also require rotor replacement. Follow the brake maker’s instructions rather than assuming every rotor can be saved by cleaning.
Possible clues include persistent squealing after the rotor is clean and dry, an unusual loss of stopping power, or oil visible around the caliper. A shiny pad surface can indicate glazing, but it does not establish the cause on its own. Our guide to when e-bike brake pads need replacement explains other warning signs.
Have a qualified bicycle mechanic inspect persistent noise or contamination, especially if brake fluid may be leaking. Do not try to burn oil out of the pads, soak them in solvent, or sand them as a general do-it-yourself fix. If replacement pads or a rotor are fitted, the brake system may need the manufacturer’s bedding-in procedure before regular use.
Cleaning Will Not Fix These Brake Problems
A rotor wipe is not a substitute for brake service. Stop riding and arrange an inspection if you notice any of the following:
- Metal-on-metal grinding: Pads may be worn through or another part may be contacting the rotor.
- Visible rotor cracks, severe wobble, or strong lever pulsing: The rotor or its mounting may be damaged or out of alignment.
- A spongy lever, unusually long lever travel, or visible fluid: The hydraulic system may need qualified service.
- Weak, unpredictable, or suddenly changed stopping power: The bike is not ready for traffic, hills, or loaded riding.
A light, intermittent rub is not the same as severe grinding, but persistent rubbing still deserves diagnosis. For a routine condition check, use our five-minute e-bike brake inspection guide.
How Often Should You Clean E-Bike Rotors?
There is no single cleaning interval that fits every e-bike. Inspect the rotors during regular maintenance and clean them when you see grime, suspect an oil splash, or have used wash products near the braking surfaces. Routine wiping after every dry ride is usually unnecessary unless the manufacturer calls for it.
After a rainy ride, temporary brake noise may disappear as the brakes dry during careful, controlled use. If the bike has been exposed to mud, road salt, or wash runoff, inspect the brake area as part of your normal cleaning routine. Our guide to e-bike cleaning mistakes to avoid covers ways to keep degreaser and other products away from sensitive components.
The goal is reliable braking, not guaranteed silence. Clean the rotor using the instructions for your exact brake system, test the brakes conservatively, and have a mechanic check any loss of braking performance or noise that does not have an obvious, temporary cause.
GoEBikeLife publishes independent e-bike reviews, comparisons, and practical buying guides. Some links on this page are affiliate links. If you make a purchase through an eligible link, we may earn a commission at no additional cost to you.