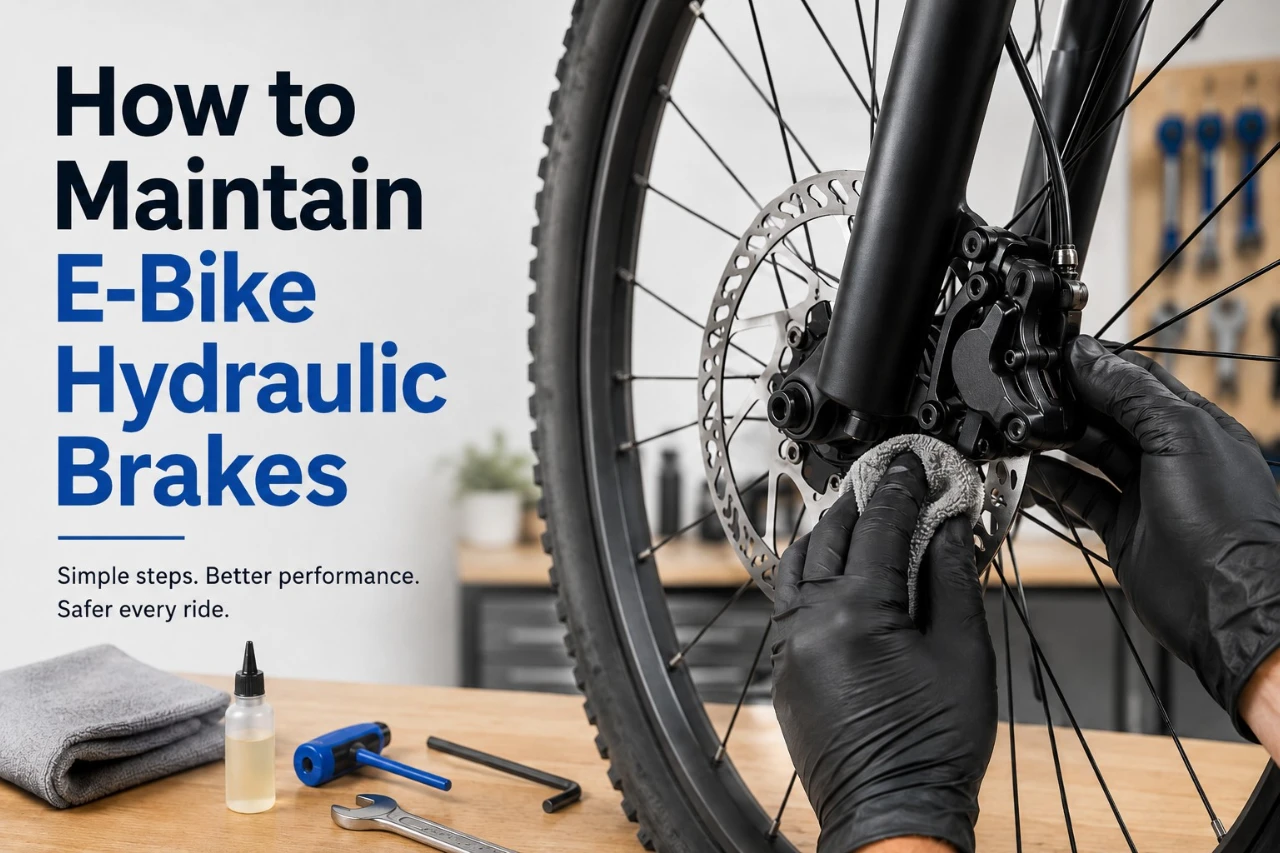
Hydraulic disc brakes are one of the best upgrades on a modern e-bike. They give you consistent stopping power with less hand effort, and they hold up well in wet conditions. But they do need regular attention to keep working safely.
E-bikes are heavier and faster than standard bicycles, which puts more demand on the brake system every single time you stop. A well-maintained hydraulic brake feels firm, responds quickly, and gives you confidence in traffic or on a trail. One that has been ignored can feel soft, pull unevenly, or fail to stop you in time.
The good news is that most hydraulic brake maintenance is straightforward. You do not need to be a mechanic to inspect your levers, clean your rotors, or spot early warning signs. This guide walks you through each step in plain language so you can keep your e-bike brakes safe between professional service visits.
Key Takeaways
- E-bike brakes face more stress than regular bike brakes, so routine inspection protects your safety.
- Most basic maintenance involves checking lever feel, inspecting pads, and cleaning rotors with isopropyl alcohol.
- Never mix brake fluid types, and visit a qualified mechanic if bleeding or fluid replacement is needed.
Why Hydraulic Brake Maintenance Matters on an E-Bike
E-bikes weigh significantly more than standard bicycles. A typical e-bike can weigh between 50 and 80 pounds, and some cargo or fat tire models weigh even more. Add your body weight, and the brakes are stopping a much heavier load every time you ride.
Most e-bikes also reach speeds of 20 to 28 mph or more depending on their class. Higher speed means longer stopping distances and greater heat buildup in the rotors and pads during hard braking.
Brake performance on an e-bike is not just about comfort. It directly affects how quickly you can stop in an emergency. A spongy lever, worn pads, or a contaminated rotor can increase your stopping distance in a situation where every foot matters.
As noted in Shimano’s hydraulic disc brake documentation, oil or grease on the disc brake rotor or brake pads may prevent the brakes from operating and result in serious injury. Regular inspection and cleaning is not optional on an e-bike. It is a basic safety habit.
How E-Bike Hydraulic Brakes Work
Understanding the system helps you spot problems faster. Here is a plain-English breakdown of each part.
Brake lever: The lever attached to your handlebar. When you squeeze it, it pushes brake fluid through a sealed hose.
Hose: The sealed line that carries brake fluid from the lever to the caliper. It should have no cracks, kinks, or wet spots.
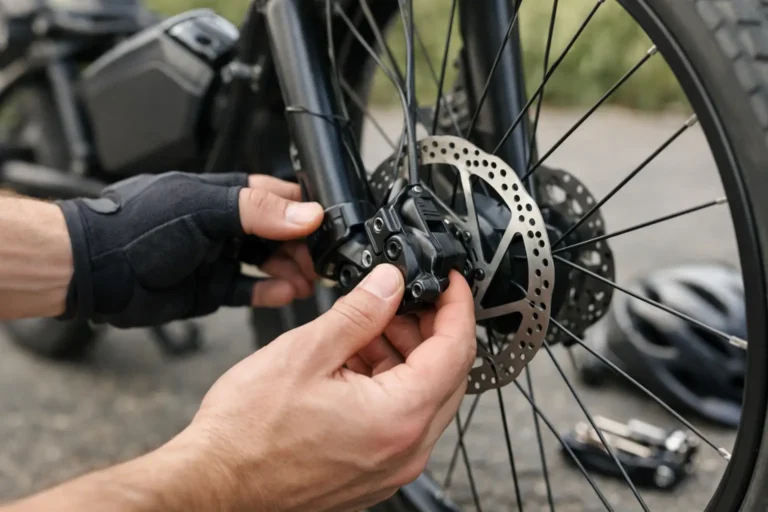
Caliper: The clamp-shaped part that sits over your brake rotor. Inside the caliper are pistons that press the brake pads against the rotor when you squeeze the lever.
Brake fluid: The liquid inside the hose and caliper that transfers your lever force to the pistons. Different brands use different fluids, either mineral oil or DOT fluid, and these must never be mixed.
Pistons: Small cylinders inside the caliper that push outward when fluid pressure builds, pressing the pads against the rotor.
Brake pads: The friction material that grips the rotor to slow the wheel. Pads wear down over time and must be replaced.
Rotor: The metal disc attached to your wheel hub. The pads clamp against the rotor surface to create stopping force. Rotors can become contaminated, scored, or warped over time.
How Often Should You Maintain E-Bike Hydraulic Brakes?
The right inspection schedule depends on how often you ride, how heavy your e-bike is, and what conditions you ride in. Wet, muddy, or rough terrain wears brakes faster than smooth, dry commutes.
| Interval | What to Check |
|---|---|
| Before every ride | Squeeze each lever; confirm firm feel and full engagement before the bar |
| Weekly | Listen for rubbing or squealing; visually check for rotor rub and wet spots near the caliper or lever |
| Monthly | Inspect pad thickness, rotor surface, caliper bolt tightness, and wheel spin for brake drag |
| Every 6 to 12 months | Consider a full brake bleed (DOT fluid systems may need bleeding annually; mineral oil systems typically every two years, per SRAM’s brake service guide) |
| After wet or muddy rides | Rinse the rotor area, dry the bike, re-inspect pads and rotor for contamination |
Riding frequently in demanding conditions means more frequent checks. Even casual riders should do a quick lever squeeze and a visual rotor scan before every ride.
Step 1: Check Brake Lever Feel
Your brake lever tells you a lot about the health of the system. Squeeze each lever slowly before you ride and pay attention to how it feels.
Firm lever feel means the system is pressurized correctly and the pads are engaging the rotor at a consistent point. This is what you want.
Spongy lever feel means there is likely air in the hydraulic system. Air compresses under pressure, which reduces the force transferred to the caliper. A spongy lever that does not improve on its own usually means the brakes need bleeding.
Lever pulling too close to the handlebar can mean the pads are heavily worn, air is in the system, or the caliper pistons need attention. SRAM’s troubleshooting notes suggest checking pads and performing a piston massage before bleeding if the lever pulls too far.
If a lever feels spongy or bottoms out against the bar, do not ride until you have addressed the cause. This is a safety issue, not a nuisance.
Step 2: Inspect Brake Pads for Wear
Worn brake pads reduce stopping power and can damage your rotors if the backing plate makes metal-to-metal contact with the rotor surface.
Checking pad thickness: Remove the wheel or look into the caliper opening. According to Shimano’s brake manual, pads should be replaced when the friction material is 0.5 mm or less. Tektro’s maintenance guidelines confirm the same 0.5 mm replacement threshold. SRAM recommends replacing pads when the total pad and backing plate thickness reaches 3 mm or less.
Uneven wear means one side of the pad is thinner than the other. This often points to a caliper alignment issue where the pistons are not pushing evenly.
Contamination occurs when oil, grease, or chain lubricant gets onto the pad surface. Contaminated pads feel greasy, reduce braking power, and often cause squealing. Contaminated pads cannot be cleaned reliably and should be replaced.
Glazing happens when pads overheat and harden. Glazed pads look shiny and feel less grippy. Glazing can sometimes be addressed by re-bedding the brakes, but severely glazed pads should be replaced.
Replace pads in pairs (both sides of the caliper at the same time). If you switch pad material, such as from organic to sintered compound, SRAM recommends fitting new rotors as well to avoid noise and reduced performance.
Step 3: Clean the Brake Rotors Properly
Rotor cleanliness has a direct impact on brake performance and noise. Clean rotors help pads make full, even contact with the braking surface.
What to use: Isopropyl alcohol (90% or higher) applied to a clean, lint-free cloth is the correct choice for cleaning brake rotors. Wipe the rotor surface thoroughly, turn the cloth to a clean section, and repeat until no discoloration transfers to the cloth.
What to avoid: Do not use WD-40, chain lube, bike polish, or any oily spray near the rotor or caliper. As Shimano’s disc brake documentation clearly states, oil or grease on the disc brake rotor or brake pads may prevent the brakes from operating. Even a small amount of oil contamination can significantly reduce stopping power.
Do not touch the rotor with bare fingers. The natural oils on your skin transfer to the rotor surface and can cause contamination and noise. Always handle rotors by the edges or wear clean nitrile gloves.
After cleaning, spin the wheel by hand and listen for any rubbing or scraping sounds before riding. If noise continues after a clean rotor, the caliper may need realignment.
Step 4: Listen for Brake Noise and Fix Common Causes
Brake noise is one of the most useful early-warning signals. Do not ignore it.
| Sound | Likely Cause |
|---|---|
| Squealing | Contaminated rotor or pads, new pads that need bedding in, glazed pads |
| Rubbing or dragging | Rotor rub from caliper misalignment, bent rotor, or pad drag |
| Grinding | Severely worn pads with metal backing contacting the rotor |
| Pulsing | Warped or unevenly worn rotor, loose rotor bolts |
Squealing after a wash or wet ride often clears up once the rotor dries. Persistent squealing on clean, dry rotors usually means contamination or pad glazing.
Rubbing that does not stop means the rotor and caliper are not properly aligned. MAGURA’s brake guide recommends pushing the pads all the way back and recentering the caliper parallel over the rotor.
Grinding is serious. It often means you have worn through the friction material and the metal backing is contacting the rotor. Stop riding and replace the pads immediately.
Pulsing during braking points to a warped rotor or loose rotor bolts. Pulsing can also be felt through the lever as inconsistent engagement.
Step 5: Check for Fluid Leaks and Hose Damage
A hydraulic brake system is sealed. Any fluid outside the system means something has failed, and that means your braking power is compromised.
Where to inspect:
- Caliper area: Look for wet spots, oily residue, or dried fluid stains around the caliper body and hose fitting.
- Hose fittings: Check where the hose connects to the caliper and lever. These fittings are common failure points if the hose was overtightened or damaged.
- Lever area: Look under and around the lever body for any fluid seeping from the reservoir or lever pivot.
- Along the hose: Run your fingers along the full length of the hose and look for cracks, kinks, pinch points, or soft sections.
If you find any wet spots or visible fluid, do not ride. A leak means the system is losing pressure, and your braking force will be reduced or unpredictable.
Take the bike to a qualified mechanic if you find a leak. Brake hose repair and system resealing require proper tools and technique, and using the wrong fluid or fittings can make the problem worse.
Step 6: Know When Your Brakes Need Bleeding
Bleeding removes air bubbles from the hydraulic system and replaces old fluid. It restores a firm, consistent lever feel.
Signs your brakes need bleeding:
- Spongy lever feel that does not improve after a pad and rotor inspection
- Lever travel that has increased noticeably
- Inconsistent braking power, such as strong on one pull and weak on the next
- Lever that slowly firms up after several squeezes
Air enters the system gradually over time or suddenly through a damaged hose or fitting. When air is present, the lever compresses the air bubble instead of pushing fluid directly to the pistons, which reduces stopping force.
The bleed process involves injecting fresh fluid through the system until all air is purged. The exact method depends on your brake brand. SRAM’s DOT fluid brake bleed manual and Shimano’s mineral oil bleed documentation each follow different procedures. Always use the manufacturer’s specific manual for your brake model.
If you are not comfortable with the bleed process, have a qualified bike mechanic handle it. Doing it incorrectly can introduce more air or use the wrong fluid, both of which make braking worse.
Mineral Oil vs DOT Fluid: Do Not Mix Brake Fluids
This is one of the most important rules in hydraulic brake maintenance. Different brake brands use different fluids, and the two types are not interchangeable.
Mineral oil is used by Shimano, Magura, and several other brands. It is less aggressive than DOT fluid and does not damage paint or skin on contact.
DOT fluid (typically DOT 4 or DOT 5.1) is used by SRAM, Tektro, and others. As stated in SRAM’s bleed documentation, only DOT 4 or DOT 5.1 fluid should be used with SRAM hydraulic brakes; using any other fluid will damage the system and make the brakes unsafe.
Mixing the two fluid types will damage the seals inside your caliper and lever. This can cause leaks, loss of braking power, or complete system failure. The cost of fixing a contaminated system is far higher than using the correct fluid from the start.
Always check your brake manufacturer’s manual before adding or replacing fluid. The fluid type is often stamped on the lever body or listed in the documentation that came with your e-bike.
Common Hydraulic Brake Maintenance Mistakes to Avoid
Most brake problems come from a small number of avoidable errors. Keep these in mind every time you service your brakes.
- Using the wrong brake fluid. Always match the fluid to the manufacturer’s specification. Never guess.
- Spraying lubricants near rotors or calipers. Chain lube, WD-40, and spray degreasers can contaminate pads and rotors instantly. Mask off the brake area before any drivetrain lubrication work.
- Riding with worn pads. Waiting too long to replace pads leads to metal-on-metal contact, which scores and ruins rotors. Rotors cost significantly more than pads.
- Ignoring leaks. A small leak gets worse under use and heat. Address any fluid leak before riding again.
- Over-tightening caliper or rotor bolts. Overtightening can warp rotors or strip threads. Use a torque wrench and follow the manufacturer’s torque specification.
- Contaminating new pads during installation. Handle new pads only by the backing plate. Never touch the friction surface with bare fingers, and keep them away from any fluid or lubricant.
When to Replace Brake Pads, Rotors, or Visit a Bike Shop
Some maintenance tasks are straightforward at home. Others are better handled by a professional.
Replace brake pads when:
- The friction material is at or below 0.5 mm thickness
- The pads are contaminated with oil or grease and cannot be cleaned
- The pads are glazed and braking feels inconsistent even after rotor cleaning
Replace rotors when:
- The rotor is worn below the minimum thickness marked on the rotor itself (SRAM lists 1.55 mm for 1.85 mm rotors and 1.7 mm for 2 mm rotors, as noted in their brake service documentation)
- The rotor is visibly warped and causes pulsing during braking that caliper adjustment cannot fix
- The rotor surface is deeply scored or cracked
- You are switching pad compound materials, where fitting a fresh rotor is recommended
Visit a qualified bike mechanic when:
- The brake lever remains spongy after pad and rotor inspection
- You find fluid leaks at the hose, caliper, or lever
- Braking power is inconsistent and does not improve after cleaning
- You are not confident performing a brake bleed yourself
- Any brake component appears cracked, bent, or damaged
As SRAM’s safety documentation notes, brakes are a safety-critical component. Have any uncertain or complex brake work performed by a qualified bicycle mechanic.
Final E-Bike Hydraulic Brake Maintenance Checklist
Use this checklist before every ride and as a monthly reference.
Before Every Ride
- Squeeze each brake lever; confirm firm feel before reaching the handlebar
- Listen for rubbing or scraping as you spin each wheel
- Look for any visible fluid around the caliper, hose fittings, or lever
Weekly
- Inspect rotor surface for contamination or debris
- Listen during test stops for squealing, grinding, or pulsing
Monthly
- Check brake pad thickness visually through the caliper
- Look for rotor scoring, discoloration, or warping
- Confirm caliper mounting bolts and rotor bolts are snug but not overtightened
- Spin each wheel freely and confirm no persistent brake drag
Every 6 to 12 Months
- Evaluate whether a brake bleed is needed based on lever feel
- Check hose condition along the full length
- Confirm you are using the correct fluid type for your brake brand
- Consider having a qualified mechanic inspect the full system
Keeping up with these checks takes only a few minutes per ride and can prevent much larger problems. GoEBikeLife covers practical e-bike maintenance topics and brake-related buying advice to help you make informed decisions about pads, rotors, bleed kits, and compatible brake parts for your specific e-bike.
Frequently Asked Questions
How do I bleed hydraulic disc brakes on an e-bike properly?
The bleed process varies by brake brand and fluid type. Start by locating the specific bleed manual for your brake model from the manufacturer’s website, such as Shimano’s official documentation portal or SRAM’s service site, and follow the steps exactly. If you are new to brake bleeding, having a qualified bike mechanic perform the first bleed is a safe starting point.
How can I adjust the brake lever feel and reach on hydraulic brakes?
Most hydraulic brake levers have a reach adjustment screw or dial near the lever pivot. Turning it moves the lever closer to or farther from the handlebar to suit your hand size. This adjustment affects comfort and control but does not change the hydraulic pressure or pad position.
What should I do if my e-bike’s front brake is rubbing on the rotor?
Start by loosening the caliper mounting bolts slightly, squeezing the brake lever firmly to center the caliper over the rotor, then retightening the bolts while holding the lever. If rubbing continues, check whether the rotor is bent or whether the wheel is seated correctly in the dropout.
How do I align the caliper to stop brake noise and uneven pad contact?
MAGURA’s guidance recommends pushing the pads fully back and then centering the caliper body parallel over the rotor before retightening the mounting bolts. Confirm alignment by spinning the wheel and listening for even, drag-free rotation.
How often should hydraulic brake pads and rotors be inspected and replaced on an e-bike?
Check pad thickness monthly, or more often if you ride in wet or muddy conditions. Replace pads when the friction material reaches 0.5 mm or less. Replace rotors when they are worn below the minimum thickness stamped on the rotor, visibly warped, or deeply scored.
What are the steps to adjust the rear hydraulic disc brake on an e-bike?
The rear brake adjustment process is the same as the front. Loosen the caliper bolts, center the caliper over the rotor by squeezing the lever, retighten the bolts, and spin the wheel to confirm clean, drag-free rotation. Check pad condition and rotor alignment while you have the caliper loose.
Can contaminated brake pads be cleaned and reused?
In most cases, no. Oil or grease contamination soaks into the pad material and is difficult to remove completely. A pad that feels greasy or causes reduced braking even after rotor cleaning should be replaced. Continuing to ride on contaminated pads risks pad and rotor damage and reduced stopping power when you need it most.