An e-bike can build speed quickly and carry more weight than a standard bicycle, especially with cargo, a child seat, or a loaded rear rack. Knowing how to inspect ebike brakes before you ride helps you catch worn pads, loose parts, and weak braking feel while the bike is still in your driveway – not when you need to stop at an intersection.
Most owners can complete a basic brake inspection in about five minutes. Your goal is simple: confirm that both brakes engage firmly, the wheels turn freely when released, and there are no signs of damaged or excessively worn components. If your owner’s manual gives different inspection intervals, pad limits, or service instructions, follow the manufacturer’s guidance.
How to Inspect Ebike Brakes in Five Minutes
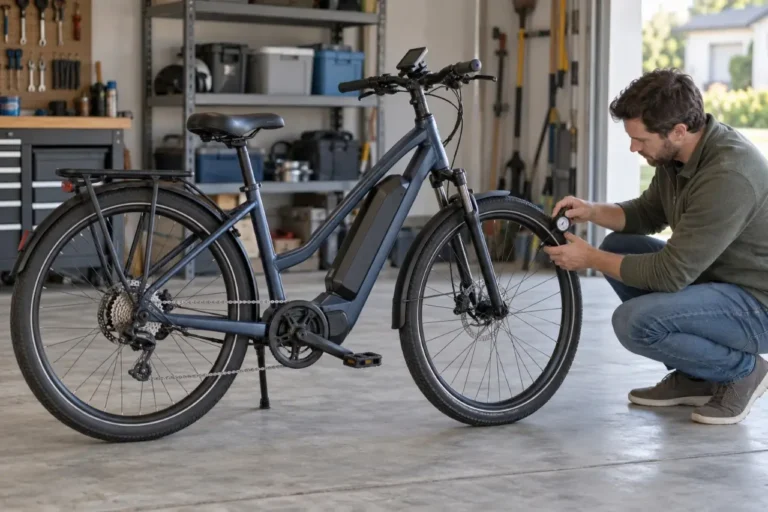
Park the e-bike on level ground, turn the electrical system off, and remove the battery if your manual recommends it for maintenance. Make sure the bike is stable. A repair stand is useful, but not required; you can inspect most parts with both wheels on the ground.
1. Check the brake levers first
Squeeze each brake lever several times. The lever should move smoothly and return quickly when released. It should feel firm before it reaches the handlebar grip.
On a hydraulic brake, a lever that pulls almost all the way to the grip or feels unusually soft may indicate air in the system, worn pads, a fluid leak, or another issue that needs service. On a mechanical disc brake or rim brake, a lever with excessive travel may point to cable stretch, worn pads, or an adjustment need.
Look closely at the lever body, hose connection, and cable entry point. Fluid around a hydraulic lever, a cracked housing, a frayed cable, or a lever that does not return normally are reasons to stop riding until the problem is addressed. Do not try to identify or add brake fluid unless you know the exact system requirements. Hydraulic brakes may use mineral oil or DOT fluid, and using the wrong one can damage seals.
2. Make sure each brake actually holds the bike
With the bike on the ground, squeeze one brake lever firmly and push the bike forward, then backward. The wheel controlled by that lever should resist turning. Repeat with the other brake.
Many e-bikes use the left lever for the front brake and the right lever for the rear brake, but this is not universal. Confirm which lever controls which wheel on your own bike before riding in traffic or on a hill.
A small amount of tire movement against the ground is normal when you push hard. What you do not want is a wheel that rolls freely with the lever firmly squeezed. If one brake will not hold the bike, do not rely on the other brake alone for normal riding.
3. Inspect the brake pads
Brake pads are the replaceable friction material that presses against a disc rotor or rim. E-bike pads can wear faster than expected because e-bikes are often heavier and travel at higher average speeds than pedal-only bikes.
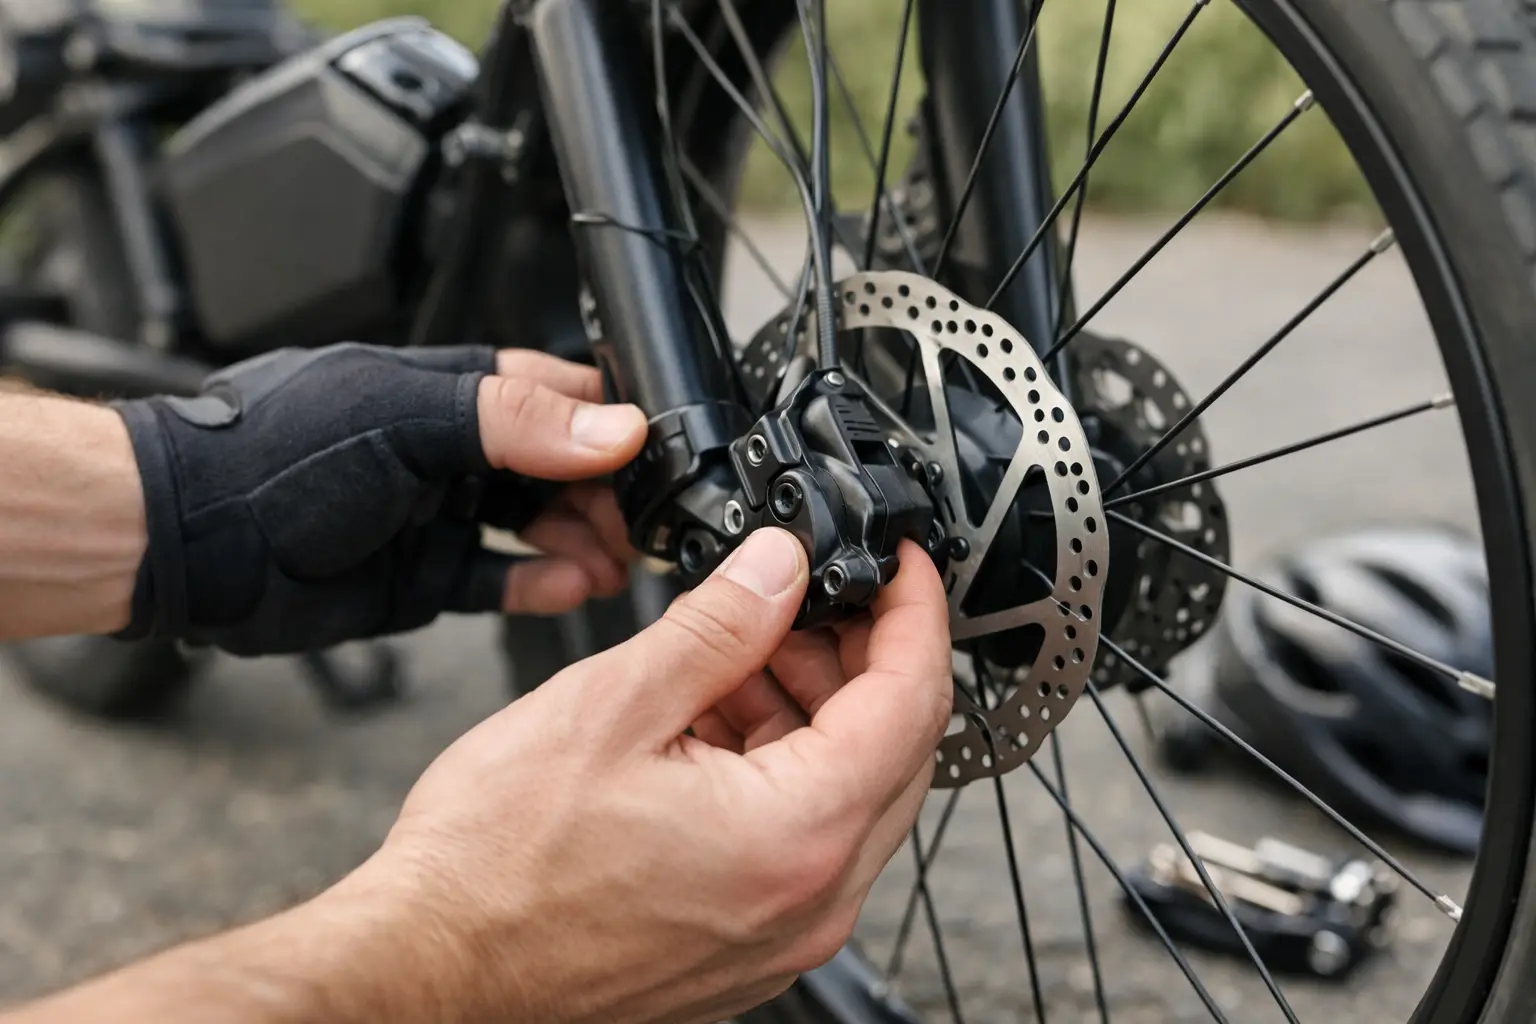
For disc brakes, look into the caliper from above or behind the wheel. You should see pad material between the metal backing plate and the rotor. If the friction material is very thin, unevenly worn, cracked, glazed to a shiny surface, or contaminated with oil, schedule pad replacement. Your brake manufacturer may specify a minimum pad thickness, which takes priority over a general visual check.
For rim brakes, inspect the pads where they contact the wheel rim. Replace them if the wear grooves are nearly gone, the rubber is hardened or split, or the pad is close to its metal holder. The pad should contact the rim squarely, not the tire sidewall. A pad that rubs the tire can damage it and should be corrected before riding.
Avoid touching disc brake rotors or pads with oily hands, chain lubricant, spray cleaner, or tire dressing. Contamination can reduce braking power and may require new pads. If you recently lubricated the chain, wipe away any overspray before checking the brakes.
4. Examine the rotors or wheel rims
Disc brake rotors are the thin metal discs attached near the wheel hub. Spin each wheel and watch the rotor pass through the caliper. It should spin without a persistent scraping sound or a pronounced side-to-side wobble.
Light, occasional rubbing can happen after a wheel is removed and reinstalled, or when a rotor is slightly out of alignment. Constant rubbing creates drag, reduces range, and may signal a bent rotor, a misaligned caliper, or a sticking piston. Do not attempt to bend a rotor by hand. Rotors can be sharp, and improper straightening can make the problem worse.
Also look for deep grooves, cracks, bluish heat discoloration, loose rotor bolts, or an obviously warped rotor. Rotor thickness limits vary by manufacturer, so a qualified bicycle mechanic should measure a rotor that looks heavily worn or has seen repeated overheating.
If your e-bike has rim brakes, inspect the braking surface of each rim instead. Remove dirt and check for cracks, dents, bulges, or a worn sidewall. Some rims have a wear indicator groove or line. If it is no longer visible, follow the wheel manufacturer’s service guidance.
5. Check cables, hoses, and mounting hardware
Follow each brake cable or hydraulic hose from the lever to the brake. It should not be kinked, crushed, severely rubbed, or pulled tight when you turn the handlebars from side to side. On cargo e-bikes and folding models, pay extra attention to routing near hinges, racks, and steering stops.
Check that the brake caliper is securely mounted and that the wheel is fully seated in its fork or frame. A loose axle, quick-release, or thru-axle can affect brake alignment and is a serious safety concern. Use the tightening method and torque guidance in your owner’s manual. If you are unsure whether the wheel is installed correctly, have a shop check it before riding.
Mechanical brake cables should not have broken strands, rust, or a loose cable-end cap. Hydraulic hoses should be dry. Any wetness around a hose, caliper, lever, or fitting may be a hydraulic-fluid leak and needs prompt professional attention.
6. Take a controlled test ride
After the stationary inspection, ride slowly in a clear, flat area away from traffic. Test each brake separately at walking speed, then test both together. The bike should slow predictably without pulling hard to one side, shuddering, squealing continuously, or requiring excessive lever force.
A brief squeal in wet conditions can be normal. Persistent noise, vibration, a pulsing lever, or reduced stopping power is not something to ignore. Give the brakes time to cool before touching a rotor after a downhill ride or repeated hard stops, as rotors can become hot enough to burn skin.
What You Can Check Yourself and What Needs Service
A visual inspection, lever test, basic cleaning, and a low-speed brake test are reasonable owner tasks. You can also use a clean, dry cloth to remove surface dust from accessible parts. Keep cleaners and lubricants away from pads, rotors, and braking surfaces.
Brake adjustment is more dependent on the system. A rider who understands their manual may be able to make a minor mechanical cable adjustment. Hydraulic brake bleeding, hose replacement, rotor straightening, piston service, and diagnosing fluid leaks are better handled by a qualified bicycle mechanic. These jobs require the correct tools, specifications, and fluids, and mistakes can leave an e-bike with little or no braking power.
Seek service promptly if a brake lever reaches the grip, a hydraulic system leaks, a rotor is cracked or badly bent, pads are worn to the backing plate, a wheel is loose, or braking power changes suddenly. Do not ride an e-bike with a known brake fault just because one brake still works.
Set an Inspection Routine That Matches Your Riding
Inspect both brakes before longer rides, fast commuting routes, hill descents, or trips carrying cargo. For everyday riders, a quick lever-and-wheel check before each ride and a closer visual inspection every week is a practical starting point. Riders who commute in rain, ride steep terrain, haul loads, or use their e-bike for deliveries may need to inspect pads and rotors more often.
Keep an eye on changes rather than waiting for a fixed mileage number. A new scraping sound, longer stopping distance, different lever feel, or repeated need for adjustment is useful information. Brakes rarely become unsafe without some warning, and a short check gives you time to respond before a small wear issue becomes a ride-ending problem.
A reliable e-bike should feel predictable when you slow down. Make brake checks part of the same routine as checking tire pressure, battery charge, and lights, and every ride starts with a little more margin for safety.
Frequently Asked Questions
1. How often should I inspect my ebike brakes?
Perform a quick lever and braking check before every ride. Inspect the pads, rotors, cables, hoses, and mounting hardware more closely at least once a week. Check them more frequently if you ride in rain, descend steep hills, carry cargo, or use your ebike for daily commuting.
2. How do I perform a quick pre-ride ebike brake check?
Squeeze each brake lever to confirm it feels firm and returns smoothly. Test whether each brake holds its wheel, inspect the pads and rotors for damage, and check cables or hoses for wear or leaks. Finish with a low-speed test in a clear, flat area.
3. How can I tell if my ebike brake pads are worn?
Disc brake pads may need replacement when the friction material looks very thin, uneven, cracked, glazed, or contaminated. Rim brake pads should be replaced when their wear grooves disappear or the rubber becomes hardened or split. Follow the brake manufacturer’s minimum-thickness specifications.
4. Why does my ebike brake lever pull close to the handlebar?
Excessive lever travel can indicate worn pads, cable stretch, poor adjustment, air in a hydraulic system, or a fluid leak. Stop riding if the lever reaches the grip or braking power has suddenly decreased. Have the system inspected if the cause is not obvious.
5. Is it normal for an ebike brake rotor to rub?
Light, occasional rubbing may occur after reinstalling a wheel or from minor misalignment. Constant scraping is not normal and may indicate a bent rotor, misaligned caliper, or sticking piston. Persistent rubbing should be corrected because it creates drag and can reduce battery range.
6. Can I ride an ebike if only one brake is working?
No. Riding with only one functioning brake significantly reduces stopping control and increases the risk of an accident, especially on hills or in traffic. Do not ride until both the front and rear brakes engage properly and can stop the bike predictably.
7. Why do my ebike brakes squeak?
Moisture, dirt, glazed pads, poor alignment, or contamination from oil and lubricant can cause brake noise. Brief squeaking in wet conditions may be normal, but persistent noise accompanied by vibration or reduced braking power requires inspection and possibly professional service.
8. When should ebike brakes be serviced by a professional?
Seek professional service for hydraulic leaks, brake bleeding, damaged hoses, severely bent or cracked rotors, loose wheels, pads worn to the backing plate, or sudden braking-power loss. You should also visit a qualified mechanic whenever you are unsure whether the brakes are safe.