A little joy belongs in every day.

A practical e-bike child seat safety checklist covering compatibility, installation, harness adjustment, riding changes, and pre-ride checks.
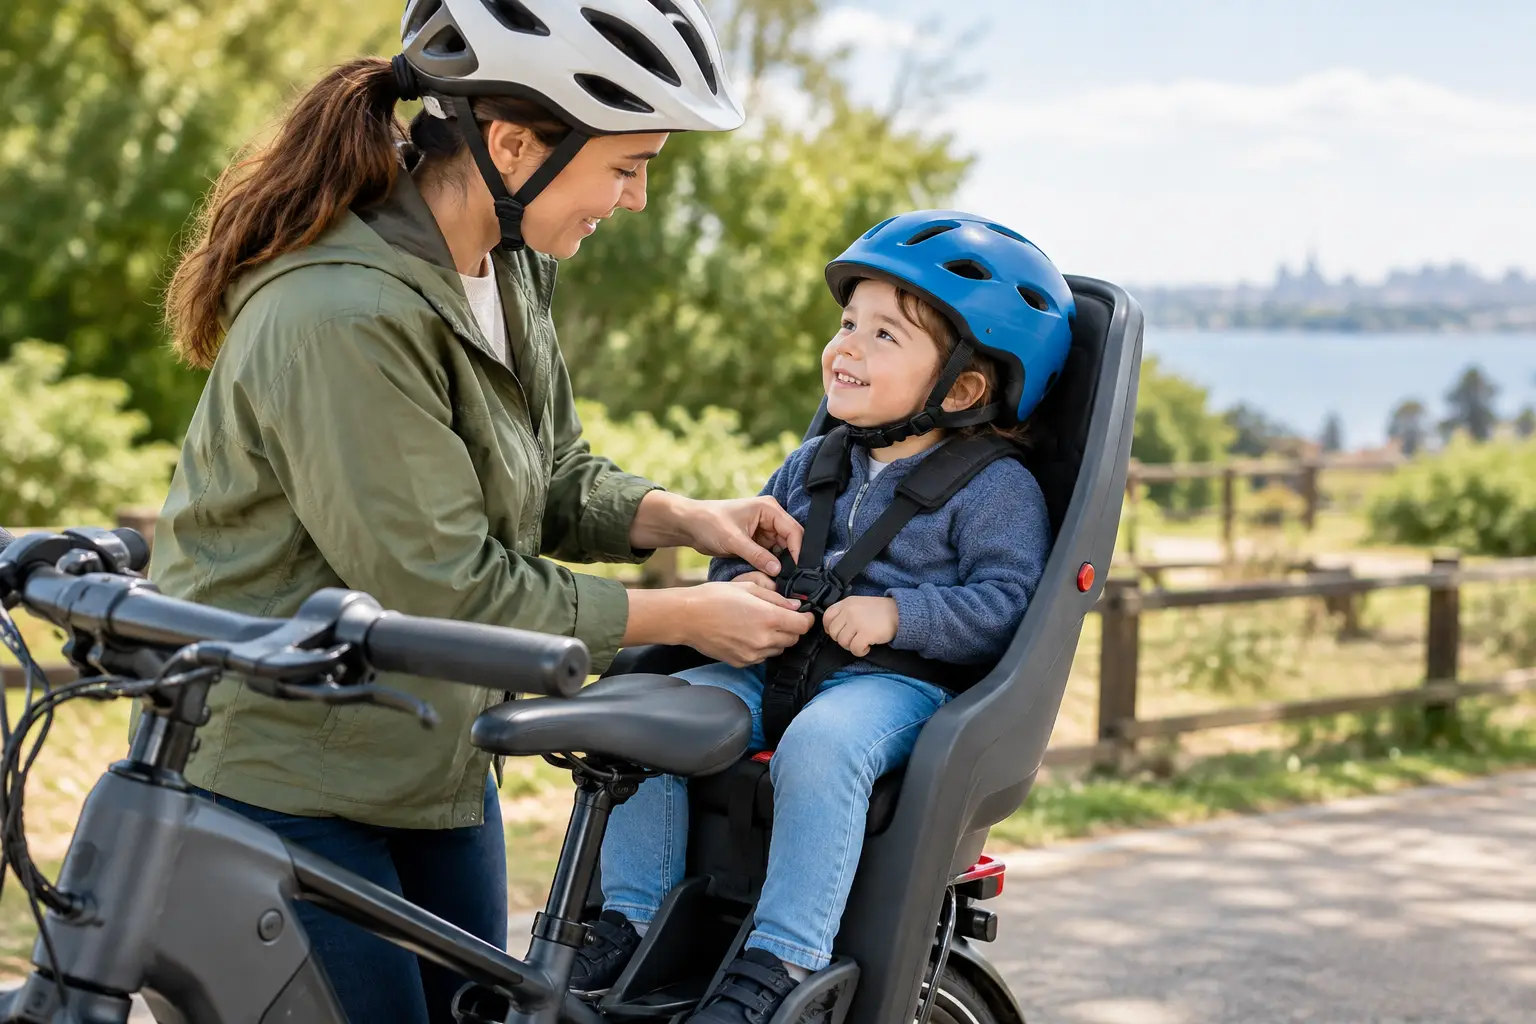
A secure ebike child seat starts with the right match between the seat, the bike, and the child. Use only a child seat approved for your e-bike’s mounting point and load limits, install it exactly as the seat manufacturer specifies, and confirm the child fits the harness and foot restraints before every ride. Then ride more slowly and brake earlier than you would alone. An e-bike’s extra weight and quick acceleration can make a small setup mistake matter more.
A child seat can make short school runs, park trips, and everyday errands practical. It also changes how your e-bike handles. Your balance at stops, turning radius, stopping distance, and ability to react to potholes all deserve more attention with a young passenger aboard.
Do not assume a child seat fits because it attaches to a rear rack or the bike has mounting points that look similar. Child seats are designed around specific attachment methods, such as a frame mount, a dedicated rear rack, or a front mount. The seat manufacturer’s instructions identify the compatible frame or rack dimensions, required hardware, and maximum rider and child weights.
Check your e-bike owner’s manual, too. Some racks are rated only for panniers or light cargo, even if they appear sturdy. A rack must be specifically approved for carrying a child seat and the combined load. The rack’s capacity, the seat’s capacity, and the e-bike manufacturer’s stated limits all apply. Follow the lowest applicable limit.
Child readiness matters as much as the hardware. Most child seats are intended for children who can sit upright steadily and meet the seat manufacturer’s minimum age, height, and weight requirements. Many manufacturers specify that the child must be able to support their own head while wearing a helmet. Minimum age, height, and weight requirements vary by seat design. Follow the child-seat manual rather than using a general age rule.
A child who has outgrown the seat’s weight, height, or harness range should not be squeezed in for one more season. At that point, a properly designed child trailer or other age-appropriate setup may be more suitable, but it still needs to be compatible with the bike and local riding rules.
Installation is not the place to substitute hardware, improvise spacers, or tighten parts by feel if the instructions specify a torque value. E-bikes often have thicker frame tubing, integrated batteries, unusual rack designs, suspension movement, or cable routing that affects child-seat fit.
Before installing the seat, inspect the frame or rack for cracks, loose fasteners, bent tubing, corrosion, or damage. A rack-mounted seat should sit fully on the approved rack surface, with its attachment system engaged as directed. A frame-mounted seat must have adequate clear space and must not press against cables, the battery case, suspension components, or the rear wheel.
If the installation calls for a locking clamp, retaining pin, safety strap, or secondary latch, use every part. Those pieces are not optional backups. They help prevent the seat from shifting or separating if the primary connection is disturbed.
With the seat installed but empty, rotate the pedals and check where your heels travel. Make sure your feet cannot strike the seat, footrests, or the child’s shoes. Also verify that the seat, straps, and footrests cannot reach the rear tire, spokes, disc rotor, chain, or derailleur through the full range of normal movement.
This check is especially important on full-suspension e-bikes. If the bike has rear suspension, follow the manufacturer’s instructions for checking clearance when the suspension compresses. A seat that appears clear while parked can contact the tire over a bump.
Hold the bike steady and firmly try to move the empty seat side to side, forward and back, and upward. It should not rock, slide, rattle, or rotate beyond the small amount described in its instructions. Recheck the attachment after the first few rides, since mounting hardware can settle into place.
If the seat loosens repeatedly, stop carrying a child until the cause is identified. Do not solve the problem with tape, zip ties, extra padding, or unapproved bolts. A qualified bicycle shop can inspect the rack, frame, and installation when the manual does not provide a clear answer.
A properly installed seat cannot protect a child who is not secured inside it. Use the shoulder harness, waist buckle, and foot restraints on every trip, including a ride around the block. Adjust the straps so they lie flat and snugly hold the child without pinching or restricting breathing.
The harness should keep the child from standing, leaning far out, or slipping downward when the bike starts or stops. Bulky winter coats can make straps seem tight at first but leave too much room once the coat compresses. Check the fit again after the child is seated.
Secure both feet in the footrests and adjust the straps to keep shoes away from the wheel and spokes. Loose shoelaces, long coat strings, scarves, and dangling toys also need attention. Keep small items contained so they cannot fall into the wheel or distract the rider.
A bicycle helmet that fits the child correctly is a sensible baseline, and helmet requirements vary by state and local jurisdiction. The helmet should sit level, not pushed back by the seat’s headrest. If the seat’s shape makes proper helmet positioning difficult, stop and check the seat manufacturer’s fitting guidance.
| Preview | Product | Price | |
|---|---|---|---|

| Kids Bike Helmet, 3 Sizes from Toddler to Youth, Blue, Small | $34.99 | View on Amazon |
An e-bike can accelerate quickly and carry speed easily, particularly downhill. With a child on board, use lower assist levels until you are comfortable with the changed handling. Start gently, pedal smoothly, and avoid sudden throttle input if your e-bike has a throttle.
Stopping also takes more distance. The child seat and passenger shift weight rearward and raise the bike’s center of gravity, meaning the balance point is higher than when riding solo. Begin braking sooner, use both brakes progressively, and reduce speed well before turns, intersections, wet leaves, gravel, and driveway ramps.
At stops, keep the bike as upright as possible and put a foot down before the child moves. Mount and dismount only after applying the brakes and stabilizing the bike. Many riders find it easier to load the child while the bike is supported by a sturdy kickstand, but a kickstand is not a guarantee against tipping. Keep one hand on the bike, stay beside it, and never leave a child seated on an unattended bike.
Avoid carrying a child in a seat on routes with deep ruts, high curbs, rough singletrack, or fast traffic where you cannot maintain a comfortable buffer. The safest route may be longer but smoother, slower, and easier to stop on.
| Preview | Product | Price | |
|---|---|---|---|

| BriskMore Handlebar Bike Mirror – Crystal Clear HD Glass, 360° Adjustable&Foldable Mirror… | $32.99 | View on Amazon |
Before each passenger ride, check the parts most likely to affect safety. This short routine is more useful than discovering a loose strap or soft tire halfway to daycare.
Do not overload the rest of the bike to compensate for the child seat. Heavy bags on one side can make low-speed balance unpredictable. If you use panniers or a basket, distribute weight evenly and keep cargo within the bike’s and rack’s limits.
Stop riding with a child if you hear new clicking, rattling, or rubbing from the seat area; notice seat movement; find a damaged harness or foot strap; or see a bent rack or cracked mount. A sudden change in braking, steering, tire condition, or battery security is also a reason to pause.
After a tip-over or crash, do not assume the child seat is fine because it still looks attached. Inspect it according to its manual and contact the manufacturer or a qualified bicycle mechanic if there is any uncertainty. Replace parts only with manufacturer-approved components.
Local rules may affect where and how you can ride with a child, including helmet rules, e-bike access on paths, and trail restrictions. Rules can also differ for passengers, age requirements, and where e-bikes are allowed. State, city, park, and land-manager rules can differ, so confirm the rules for your actual route before making it a regular family ride.
A secure child seat is less about finding a single perfect setup and more about building careful habits. When the seat is compatible, the harness is correctly adjusted, and your riding pace leaves room for the unexpected, an e-bike can become a calm and practical way to bring a young passenger along.