If your e-bike chain skips under pedal pressure, stop using motor assistance and begin with a visual inspection. Clean the drivetrain, check for stiff or damaged chain links, measure chain wear, and note whether the problem occurs in one gear or across the cassette. Skipping in one frequently used gear often points to worn teeth; noisy or hesitant shifting across several gears more often suggests an indexing, cable, derailleur, or hanger problem.
Do not keep riding through a hard skip. A sudden loss of pedal resistance can upset your balance, and continued use can damage the chain, rear cogs, chainring, or spokes. This guide applies mainly to e-bikes with an external chain, rear cassette or freewheel, and derailleur. For an internally geared hub, belt drive, automatic drivetrain, or single-speed system, follow the manufacturer’s instructions or use a qualified bicycle mechanic.
Is It Chain Skipping or Poor Shifting?
The timing and feel of the problem provide the best starting clues.
| What you notice | More likely cause | First check |
|---|---|---|
| Pedals lurch forward with a clunk under load | Worn chain or sprocket teeth; damaged chain link | Measure chain wear and inspect the gear being used |
| Chatter or hesitation in several gears | Incorrect indexing, cable or housing friction, bent hanger | Check shifting one gear at a time with the bike powered off |
| Skip in one rear gear, especially after fitting a new chain | Worn or damaged cassette/freewheel sprocket | Inspect that sprocket and ask a shop to confirm wear |
| Chain drops off the cassette or approaches the spokes | Limit adjustment, hanger, derailleur, or installation problem | Stop riding and arrange an inspection |
| Pedals slip but the chain does not jump | Freewheel, freehub, crank, or internal-drive fault | Stop riding and have the drive mechanism inspected |
| Motor surges but the pedals do not slip | Electrical or assist-system issue rather than chain skip | Check the display and owner’s manual; seek e-bike service if needed |
Cleaning can improve a contaminated or stiff drivetrain, but it cannot repair worn teeth, a bent hanger, or a failing freewheel mechanism. For related electrical and mechanical symptoms, see our beginner’s guide to common e-bike problems.
Make the E-Bike Safe Before Inspection
- Move the bike to a level, well-lit work area away from traffic.
- Turn the electrical system completely off and disconnect the charger.
- If the battery is designed for routine removal and the owner’s manual recommends it for maintenance, remove it with dry hands and place it in a secure, dry location.
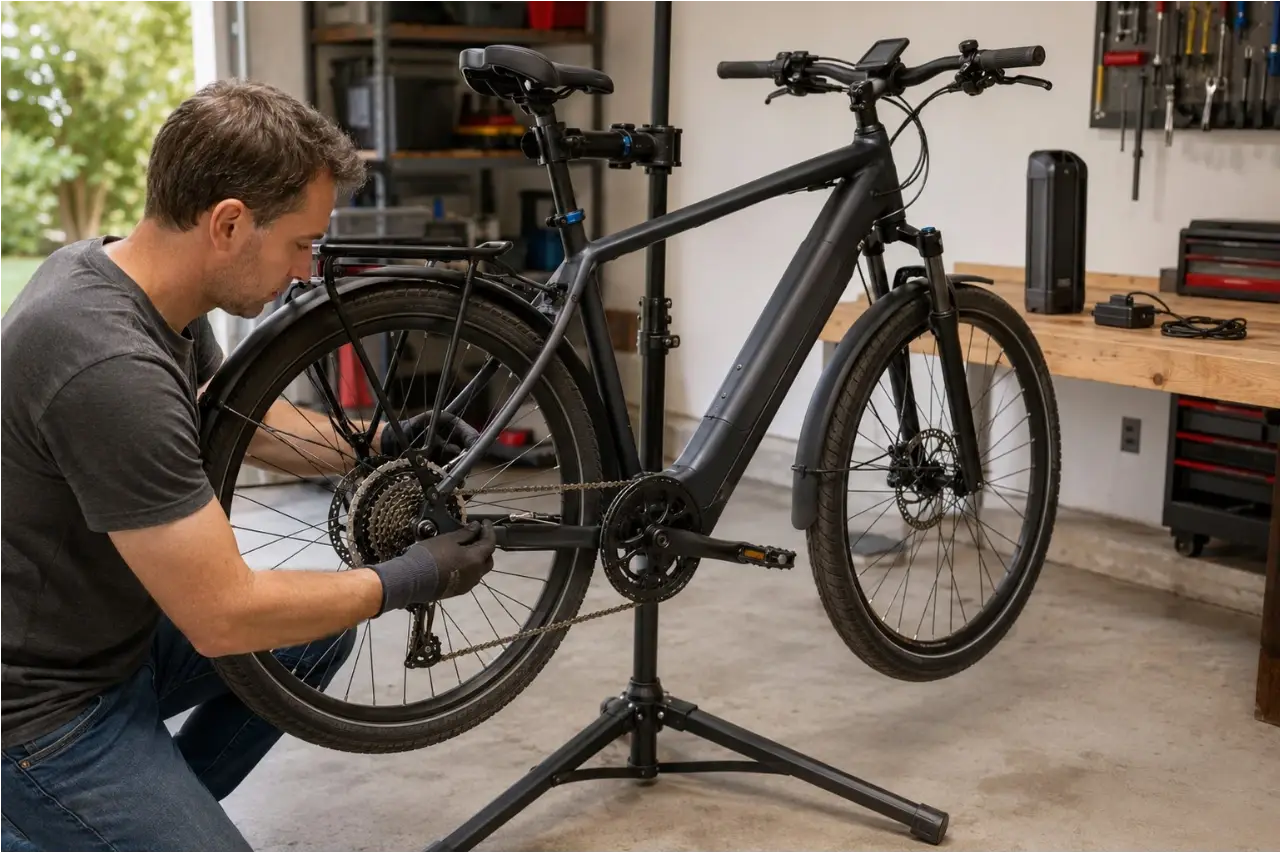
- Support the bike in a repair stand rated for its total weight, if available. Clamp only at a location approved by the frame or stand manufacturer.
- Keep fingers, hair, clothing, rags, and tools away from the chainring, chain, cassette, and rear wheel.
Never use the throttle, walk mode, or pedal assist to turn the drivetrain during inspection. Rotate the cranks slowly by hand only. If you cannot support the bike securely or the drivetrain cannot be turned safely, take it to a shop.

How to Diagnose and Fix E-Bike Chain Skipping
1. Note Exactly When the Skip Happens
Before adjusting anything, record whether the problem occurs:
- In one rear gear or several
- Only during hard pedaling, climbing, or acceleration
- Immediately after a shift
- After a fall, transport incident, wheel removal, or chain replacement
- While pedaling or while coasting
This prevents random adjustments and helps a mechanic reproduce the fault. If the skip began immediately after service, recheck the work or return the bike to the shop that performed it.
2. Clean and Lubricate the Drivetrain
Heavy contamination can make shifting rough, restrict chain articulation, and hide damage. Wipe away loose dirt, then clean the chain, rear cogs, chainring, and derailleur pulleys with bicycle-compatible products. Keep cleaner and lubricant away from disc rotors, brake pads, tires, electrical connections, battery contacts, and motor seals.
Let the drivetrain dry, apply bicycle chain lubricant to the chain rollers, and wipe away the excess. Do not assume that cleaning has fixed the problem until the bike passes a careful low-load test. Our complete guide explains how to clean an e-bike drivetrain without damaging the brakes or electronics.

3. Inspect the Chain for Damage or Stiff Links
Turn the cranks slowly by hand and watch each chain link pass through the derailleur pulleys and around the chainring. Look for:
- A link that does not articulate smoothly
- Bent, cracked, twisted, or heavily corroded links
- A connecting pin or reusable link that appears incorrectly installed
- A chain routed outside a derailleur-cage guide tab
- Excessive slack or a derailleur cage that cannot maintain tension
Do not ride with a cracked, bent, incorrectly joined, or repeatedly binding chain. Chain selection, joining method, direction, and installation vary by drivetrain. Use the chain and component manufacturer’s instructions or have a mechanic replace it.
4. Measure Chain Wear
Pins and rollers wear over time, increasing the chain’s effective pitch. This is commonly called “chain stretch,” although the side plates themselves are not stretching. Mid-drive motors send motor and rider force through the chain, while load, shifting technique, contamination, hills, and cargo can also affect wear.
Use a chain-wear gauge that is suitable for the drivetrain, and follow the chain or drivetrain manufacturer’s replacement limit. Wear limits are not identical for every chain and gear system. A bicycle shop can measure the chain if you are unsure which gauge reading applies.
Replacing a worn chain early may protect the rear cogs. However, a new chain can skip on a cassette or freewheel that has already worn to match the old chain. Do not repeatedly replace or shorten chains in an attempt to compensate for worn sprockets.

5. Inspect the Cassette, Freewheel, and Chainring
Examine the gear used when the skip occurs. Look for broken, bent, unusually pointed, or severely worn teeth and for excessive side-to-side movement. Tooth profiles are intentionally shaped differently to assist shifting, so appearance alone does not always prove wear.
If a new chain skips only on one or two well-used rear gears, worn sprockets are a strong possibility. A mechanic can confirm wear under load and determine whether the cassette or freewheel needs replacement. A damaged or loose chainring, crank, cassette, or freewheel also requires inspection before further riding.
6. Check Shifting and Derailleur Indexing
With the electrical system off and the driven wheel supported securely, rotate the cranks by hand and shift one click at a time. The chain should move to the selected gear without persistent chatter or trying to climb toward an adjacent cog.
If the manufacturer’s procedure permits barrel-adjuster correction, make only a small change at a time and record the starting position. Cable tension is not the only possible cause: contaminated or damaged cable housing, a loose component, incorrect wheel seating, or a bent derailleur hanger can produce similar symptoms.
Do not use the high- or low-limit screws as general shifting controls. Incorrect limit adjustment can let the chain enter the spokes or fall beyond the smallest sprocket. If you cannot clearly identify the correct adjustment or the chain approaches either edge of the cassette, stop and use a qualified mechanic.
7. Check the Derailleur and Hanger
A fall, transport impact, or trail strike can bend the derailleur hanger or derailleur cage. Warning signs include inconsistent shifting across the cassette, a derailleur that appears angled toward the wheel, or a fault that began after an impact.
Do not try to straighten the hanger by eye or by pulling on the derailleur. Accurate diagnosis uses a hanger-alignment tool, and a weakened hanger can break. Stop riding immediately if the derailleur or chain can contact the spokes, if the hanger is cracked, or if the derailleur is loose.
8. Confirm Chain Length or Tension Only When Relevant
On a derailleur drivetrain, an incorrectly sized or routed chain can leave too little or too much derailleur capacity. This is especially important after chain, chainring, cassette, or derailleur replacement. Chain sizing depends on the drivetrain and should follow its manufacturer’s procedure.
Single-speed and some internally geared systems use frame adjustment or a tensioner instead. A chain that is too loose can derail or jump; one that is too tight can increase wear and bearing load. Do not estimate tension by feel when the manufacturer provides a specification.
Test the Repair Safely
After any permitted maintenance or adjustment:
- Confirm that all tools, rags, and stands are clear of moving parts.
- Reinstall and lock the battery only as directed by the owner’s manual.
- Check that the rear wheel is secure and both brakes work normally. Use the three-minute e-bike pre-ride checklist before moving off.
- In a flat, traffic-free area, begin with the motor assistance off or at its lowest setting.
- Shift one gear at a time while applying light pedal pressure. Do not begin with a standing sprint, steep hill, or full-throttle test.
Stop the test if the chain skips, drops, binds, approaches the spokes, or produces persistent grinding. A stand test cannot fully reproduce riding load, so a drivetrain that appears smooth in the stand may still require professional diagnosis.
Riding Habits That Reduce Repeat Problems
Ease pedal force briefly during each shift. On a mid-drive e-bike, this also reduces motor load through the chain; if the system has a throttle that drives through the gears, reduce throttle input before shifting. Shift to an easier gear before a stop or steep climb rather than waiting until the drivetrain is under maximum load.
Keep the drivetrain clean and lubricated for the conditions, and check chain wear more often when riding in grit, rain, road salt, on steep terrain, with cargo, or at high assist levels. There is no universal mileage-based replacement interval, so follow the component manufacturer’s wear limit and inspect condition regularly. New riders can also review how to change gears smoothly.
When to Stop Riding and Visit a Bike Shop
Arrange professional inspection if:
- The chain continues to skip after cleaning and basic checks
- The chain repeatedly drops, binds, or has damaged links
- The derailleur or chain is close to the spokes
- The hanger, derailleur, chainring, or sprocket appears bent, cracked, loose, or broken
- The rear cogs, crank, or chainring have noticeable play
- Pedals slip even though the chain does not visibly jump
- The problem began after an impact or after drivetrain parts were replaced
- You cannot test or support the e-bike safely
Tell the mechanic which gear, assist level, terrain, and pedal load trigger the problem. That pattern is more useful than simply saying the gears do not work. Addressing the fault early can prevent a sudden loss of pedal support and may keep a chain problem from damaging additional drivetrain parts.
GoEBikeLife publishes independent e-bike reviews, comparisons, and practical buying guides. Some links on this page are affiliate links. If you make a purchase through an eligible link, we may earn a commission at no additional cost to you.